Land Rover Discovery: Electric windows
To prevent accidental operation, never leave the Smart key in the vehicle if children or animals are also left in the vehicle.
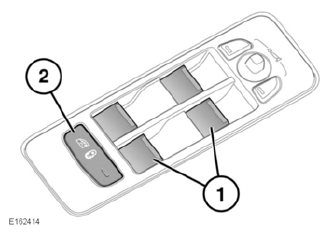
- Window switches: Briefly pull a switch
fully up and release; the window will
continue to rise until fully closed.
Briefly press a switch fully down and release; the window will continue to lower until fully open. Pressing or pulling a switch again will stop window movement.
The windows will operate for 5 minutes after the engine is switched off, as long as none of the doors are opened.
Rear windows have a short drop feature for passenger comfort. The first press of a switch will lower the window a short distance, to give a flow of air.
A second press will lower the window to its full extent.
If a resonance or booming sound occurs when a rear window is open, lowering an adjacent front window by approximately 25 mm will eliminate the condition.
- Rear window and door isolator switch: Press the switch; the rear windows and doors are isolated when the indicator light in the switch is illuminated.
If children are carried in the rear seats, the isolator switch should be used to prevent operation of the windows and doors. If the windows or doors are operated by young children there is a risk of serious injury or death.
ROOF BLIND
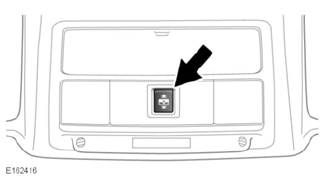
Roof blind open/close switch: To open the blind, push from the rear of the switch and release. The blind will slide fully open.
To close the blind, push from the front of the switch to the first position and release.
The blind will fully close. A further press will stop movement of the blind.
Alternatively, push from the front of the switch to the second position and hold until the blind reaches the desired position, then release.
READ NEXT:
 Anti-trap protection
Closing a window or roof blind
onto any part of the body can
result in serious injury.
Before closing a window or the
roof blind, make sure no
occupants have any part of their
body in a position where
Touch screen controls
Do not adjust the Touch screen
controls, or allow the system to
distract the driver, while the
vehicle is moving.
Always run the engine during
prolonged use of the Touch screen.
Failure to do so ma
SEE MORE:
Side Panel Sheet
Metal Repairs
Side Panel (G1770901)
- Removal
REMOVAL
NOTE:
The side panel is installed in conjunction with:
Front bumper cover
Fender
Fender splash shield
Front fender mounting panel
Windshield
Front door
Rear door
Rocker panel moulding
Roof moulding
Headliner
Side air curtain module
Roof panel
Roof front panel
Roof rear panel
Rear Center Safety
Belt Retractor (G1808246)
/ Removal and Installation
Removal
NOTES:
Some variation in the illustrations may occur, but the essential
information is always correct.
Removal steps in this procedure may contain installation details.
Disconnect the ground cable.
Refer to: Specifications (414-01, Specifications).
NOTE:
LH illustration shown, RH is
