Land Rover Discovery: Oil Seals
Never use a seal which has been improperly stored or handled.
- Take great care when removing old seals that the sealing surfaces and seal housing are not damaged.
- Carefully examine seal before installing to make sure that it is clean and undamaged.
- Make sure that the surface on which the seal is to run and also the seal housing is clean and free from burrs or scratches. Renew the component if the sealing surface cannot be restored.
- Special tools and protection sleeves are provided for installing the majority of seals and must be used when specified.
- Many seals are now coated with a protective wax and DO NOT need to be lubricated prior to installing. Always check the relevant repair procedure which will state if a seal must be installed dry. Never touch these seals with oily hands as the oil will contaminate the protective coating and affect the sealing properties of the seal; also, make sure that installing tools and protection sleeves are free from oil and grease. Seals which must be lubricated prior to installing should have the recommended lubricant applied to the areas specified in the repair procedure.
- Make sure that a seal is installed the correct way round. For example, the lip of the seal must face towards the lubricant which it is sealing.
- When installing an oil seal, make sure that it is positioned square to shaft and housing. Where the seal is to be installed to a housing prior to installing over a shaft, take care not to allow the weight of an unsupported shaft to rest on the seal.
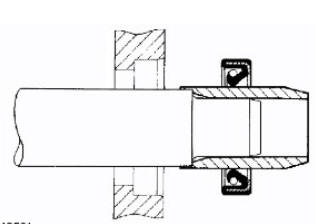
- Always use the recommended special tool and protection sleeve to install an oil seal. If no tool is specified, use a suitable mandrel approximately 0.4 mm (0.015 in) smaller than the outside diameter of the seal. Use adhesive tape on the shaft to protect the sealing lip of the seal.
.21.jpg)
- Press or drift the seal in to the depth of its housing if the housing is shouldered or flush with the face of the housing where no shoulder is provided. Make sure that the seal is not tilted in the housing when it is installed.
READ NEXT:
 Supplementary Restraint System ( SRS ) Precautions
WARNING:
Do not install rear facing child seats in the front passenger seat.
The SRS contains components which are potentially hazardous to service
personnel if not handled correctly. The following gu
Airbag and Pre-tensioner Deployment
WARNING:
During deployment parts of the airbag module become hot enough
to burn you. Wait 30 minutes after deployment before touching the
airbag module.
Deployment procedures and precautions as detail
Front Airbag Deployment -
Driver and Passenger
CAUTION:
If the front airbags are deployed, the following components must be
replaced:
Driver airbag module
Steering wheel
Passenger airbag module
Instrument panel
Fly leads (where applicable) c
SEE MORE:
Air Bags
Highly flammable, explosive - observe No Smoking policy.
Used within the vehicle as safety restraints.
The inflator contains a high-energy propellant which, when ignited,
produces a VERY HOT GAS (2500ºC).
The gas inflator (generator) used in air bags is Sodium Azide. This material is
hermetical
Health and Safety Precautions
INTRODUCTION
Modern vehicles contain many materials and liquids which if not handled
with care can be hazardous to both personal health and the environment.
Also, many of the procedures associated with vehicle maintenance and
repair involve physical hazards or other risks to health.
This subsectio
© 2019-2026 Copyright www.lrdisc.com
