Land Rover Discovery: Cylinder Head Gasket (G1875895) / Removal
PART(S)
.jpg)
REMOVAL
NOTES:
- Some variation in the illustrations may occur, but the essential information is always correct.
- Some components shown removed for clarity.
WARNING:
Make sure to support the vehicle with axle stands.
Raise and support the vehicle.
Refer to: Specifications (414-01 Battery, Mounting and Cables, Specifications).
Refer to: Engine Oil Draining and Filling (303-01B Engine - INGENIUM I4 2.0L Diesel, General Procedures).
Refer to: Cooling System Draining, Filling and Bleeding (303-03B Engine Cooling - INGENIUM I4 2.0L Diesel, General Procedures).
Refer to: Valve Cover (303-01B Engine - INGENIUM I4 2.0L Diesel, Removal and Installation).
Refer to: Engine Mount (303-01B Engine - INGENIUM I4 2.0L Diesel, Removal and Installation).
Refer to: Intake Manifold (303-01B Engine - INGENIUM I4 2.0L Diesel, Removal and Installation).
Refer to: Exhaust Manifold (303-01B Engine - INGENIUM I4 2.0L Diesel, Removal and Installation).
.jpg)
.jpg)
.jpg)
CAUTION:
Care must be taken not to damage the component.
.jpg)
CAUTION:
Remove and discard the O-ring seals.
.jpg)
CAUTION:
Discard the component
.jpg)
CAUTIONS:
- Make sure that the components are clean, dry and free from corrosion and foreign material.
- Check all timing components for wear and install new components if required.
NOTE:
Mark each camshaft roller follower and lash adjuster. Make sure each component is returned to its original fitted position.
.jpg)
.jpg)
CAUTION:
Discard the bolts.
.jpg)
CAUTIONS:
- Take extra care not to damage the edges of the component.
- Take extra care not to damage the surrounding components.
.jpg)
NOTE:
Discard the gasket.
.jpg)
CAUTION:
Make sure that the dowels and dowel holes are clean and free from debris and foreign material.
.jpg)
CAUTION:
Only use a plastic scraper to clean off the old gasket.
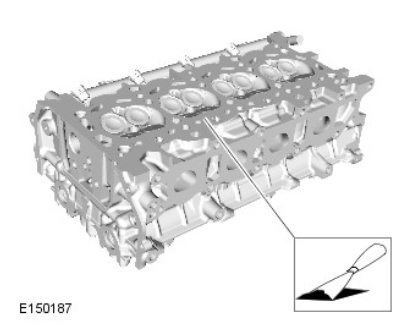
Clean and inspect the cylinder head and cylinder block.
READ NEXT:
 Cylinder Head Gasket (G1875895) / Installation
INSTALLATION
Check cylinder head face for distortion, across the center and from
corner to corner.
CAUTION:
Make sure that the dowels and dowel holes are clean and
free from debris and foreign mater
Engine - Ingenium i4 2.0l Diesel Engine (G1880413) Removal
REMOVAL
SPECIAL TOOL(S)
GENERAL EQUIPMENT
Engine hoist (1 tonne minimum capacity)
CAUTION:
Make sure that all openings are sealed. Use new blanking caps.
NOTES:
In this procedure the EU6 Exhaust
SEE MORE:
Roof Pod (G1785332) / Removal and Installation
REMOVAL
CAUTION:
Protect the surrounding paintwork to avoid damage.
NOTES:
Some variation in the illustrations may occur, but the
essential
information is always correct.
Removal steps in this procedure may contain
installation details.
Refer to: 'A' Pillar Trim Panel (501-05 Interior Trim
Rear end Sheet Metal
Repairs Rear
Side Member
Closing Panel (G1780740)
/ Removal and Installation
REMOVAL
NOTE:
The rear side member closing panel is installed in conjunction with:
Rear bumper cover
Rear bumper
Rear lamp assembly
Rear lamp panel outer
Back panel outer
Back panel inner
Rear floor side extension
Rear side member lower side extension
Rear bumper mounting upper
Spare whee
