Land Rover Discovery: Park Lock
.jpg)
- Park lock lever - Connection with park lock actuator spool valve
- Selector shaft Service Park Release (SPR) lever
- Park rod
- Spring
- Park lock pawl
- Spring
- Differential spur gear
- Park lock gear
- Park lock lever - Connection with PARK (P) sensor
The park lock comprises a selector shaft, a park lock lever, a shift rod, a park lock pawl and a park lock gear.
The park lock is electronically and hydraulically actuated via a control solenoid and a spool valve, which are located in the valve block. A slot in the spool valve engages with a connection with a lever on the selector shaft.
A second connection on the lever engages with the PARK (P) sensor which is part of the sensor unit. Refer to the 'Valve Block' and 'Sensor Unit' sections in this section for details of the individual components.
When the control solenoid is actuated, the park lock spool moves, rotating the park lock lever. The rotary motion of the lever is converted to linear movement of the shift rod which moves in the required direction to apply or release the park lock pawl from the park lock gear.
Service Park Release (SPR)
The SPR is a mechanical procedure which requires removal of the air filter housing for access. The procedure is required when there has been a loss of vehicle electrical power or a failure to the automatic transmission preventing release of the park lock.
The following procedure must be used to release the park lock before moving the vehicle. The vehicle must be held by either the electric park brake or wheel chocks to prevent it unintentionally moving when the park lock is released.
.jpg)
- SPR engaged
- SPR released
- 5mm locking pin
Apply SPR
- Make sure that the ignition is off (power mode 4)
- Remove the air filter assembly to get access to the SPR lever on the automatic transmission
- Rotate the SPR lever in a counter clockwise direction until the slot in the SPR lever aligns with a corresponding hole in the automatic transmission casing
- Hold the SPR lever in this position and insert a suitable 5mm diameter locking pin (Allen key for example) through the slot in the SPR lever and into the hole in the automatic transmission casing
- The vehicle can now be moved.
Release SPR
- Remove the 5mm diameter locking pin from the SPR lever
- Make sure the SPR lever has moved fully clockwise and the park lock is engaged
- Replace the air filter assembly.
TRANSMISSION CONTROL MODULE (TCM)
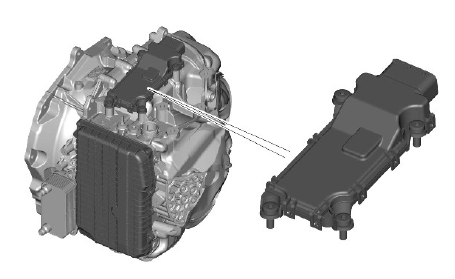
The TCM is located on the top of the automatic transmission casing and is connected on the high speed CAN powertrain systems bus to send and receive information to and from other system modules.
The TCM outputs signals to operate the transmission solenoid valves to control the hydraulic operation of the transmission.
The ECM (engine control module) supplies the engine management data on the high speed CAN powertrain systems bus. The TCM requires engine data to efficiently control the automatic transmission operation, using for example; crankshaft torque, engine speed, accelerator pedal angle, engine temperature etc.
The TCM processes signals from the transmission speed and temperature sensors, ECM and other vehicle systems. From the received signal inputs and pre-programmed data, the TCM calculates the correct gear, torque converter clutch setting and optimum settings for gear shift and lock-up clutch control.
The steering angle sensor and the ABS (anti-lock brake system) module also supply data to the TCM on the high speed CAN powertrain systems bus.
The TCM uses data from these systems to suspend gear changes when the vehicle is cornering and/or the ABS module is controlling braking or traction control.
The transmission is controlled by a 'shift by wire' system. The TCS is connected to the TCM on the high speed CAN powertrain systems bus.
Driver selections made on the TCS are passed via CAN messages to the TCM.
If the TCM, the transmission or the valve block is replaced, a diagnostic routine using an approved Land Rover diagnostic system will be required to calibrate the TCM to learn the Touchpoint Adaptions. Refer to 'Touchpoint Adaptions' and 'Clutch Adaptions' later in this section.
READ NEXT:
 Instrument Cluster
NOTE:
The following illustration shows the display when the transmission is
in CommandShift mode. PRNDS is displayed during normal
transmission operation.
Malfunction Indicator Lamp (MIL)
Gear in
Transmission Fault Status
If the TCM detects a fault with the transmission system, it will enter a
default (limp home) mode to prevent further damage to the transmission
and allow the vehicle to be driven. If possible reverse
Engine Speed and Torque
Monitoring
The ECM constantly supplies the TCM with information on engine speed
and torque through messages on the CAN powertrain systems bus. The
TCM uses this information to calculate the correct and appropria
SEE MORE:
Side Panel Sheet
Metal Repairs
Rocker Panel and B
Pillar Inner (G1770926) - Removal
NOTE:
The rocker panel and B-pillar inner is installed in conjunction with:
Front fender
Front door
Rear door
B-pillar outer panel
Headliner
Rocker panel
NOTE:
The rocker panel and B-pillar inner is detached from the inner
ring frame as it is not serviced separately
The rocker panel and
Instrument panel
Speedometer.
Tachometer.
Message centre and menu display.
Fuel gauge
As a reminder for the location of the
fuel filler, there is an arrow next to the
fuel pump symbol pointing to the
relevant side of the vehicle.
Never allow the engine to run out
of fuel, or damage to the engine
may occur.
