Land Rover Discovery: Glass, Frames and Mechanisms - Description
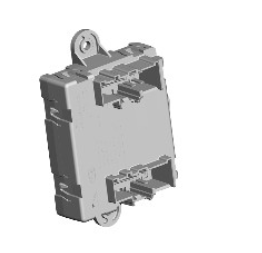
WINDOW SWITCHES
Driver Door Switchpack
Passenger Door Switchpacks
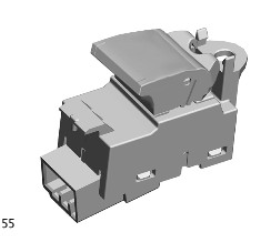
Individual window switches are installed in each of the three passenger doors. Window switches for all of the windows and a rear window isolation switch are installed in the driver door switchpack in the top surface of the door trim.
All window switches are of the non-latching rocker type. The switches have two switching positions in each direction, inch up/down and one-shot up/down. Operating the switch to the second detent position will activate the one-shot feature.
The driver door switchpack is powered by a permanent battery feed from the CJB. When the switches in the driver door switchpack are used, the switchpack translates the switch movement into a Local Interconnect Network (LIN) bus message. A LIN bus connects the driver door switchpack to the Driver Door Module (DDM). Each passenger window switch is hardwired into circuits with the related door module.
DOOR MODULES
Each door glass regulator is operated by the related door module. On all doors, door glass operation features one-shot opening and closing, and closing anti-trap protection.
When the driver door switchpack is used, it outputs a request message to the DDM on the LIN bus. If the message is for the passenger door glass, the DDM relays the message to the relevant Passenger Door Module (PDM) on the MS CAN body bus.
In addition to controlling the window lift system, the front door modules also control:
- Door locking.
- Door mirror adjustment and heating (front doors only).
- Door mirror lamps (front doors only).
- Mirror proximity cameras (front doors only).
- Wade sensing sensors (front doors only).
If a door module develops a fault, a DTC (diagnostic trouble code) is stored in its memory, DTC's can be read using the Land Rover approved diagnostic equipment.
Window regulators
Front Window Regulators
.9.jpg)
- Front rail carrier
- Door glass
- Rear rail carrier
- Door module
- Rear rail
- Cable
- Motor
- Front rail
Rear Window Regulators
.10.jpg)
- Door glass
- Rail carrier
- Door module
- Motor
- Rail
The door glass regulators are supplied as assemblies and are handed.
Front door glass regulator assembly's comprises of front and rear guide rails, a continuous cable and a motor. The door glass is located in two carriers, which are located in tracks in the guide rails
Rear door glass regulator assembly's comprises of a guide rail, a continuous cable and a motor. The door glass is located in one carrier, which is located in the track in the guide rail.
Each carrier is attached to the cable, which is wrapped around a drum driven by the motor. When the motor is operated the drum pulls the cable in the required direction to raise or lower the carrier(s).
Each door glass regulator motor is connected to the related door module, which provides the power outputs to drive the motor and receives position inputs from two Hall sensors in the motor.
AUTOMATIC TEMPERATURE CONTROL MODULE (ATCM)
.11.jpg)
- Heated front screen switch
- Heated rear screen switch
The heated front windshield and heated rear window switches are located in the ATCM.
READ NEXT:
 Glass, Frames and Mechanisms - Operation
DOOR GLASS
The door glass operates with the ignition in either accessory or on mode and,
after the ignition is switched off, for 5 minutes or until a door is
opened.
When a window open or close selec
Glass, Frames and Mechanisms
/ Diagnosis and Testing -
Inspection and Verification
PRINCIPLES OF OPERATION
For a detailed description of the Glass, Frames and Mechanisms, refer to
the relevant Description and Operation section in the workshop manual.
REFER to: Glass, Frames and Mec
SEE MORE:
Third Row Safety
Belt Buckle (G1815474)
/ Removal and Installation
REMOVAL
WARNINGS:
To avoid accidental deployment and possible personal injury,
the
backup power supply must be depleted before repairing or
replacing any air bag supplemental restraint system (SRS)
components. To deplete the backup power supply energy,
disconnect the battery ground cable and
Uni-body, Subframe and Mounting
System Rear
Subframe - AWD (G1779461)
- Removal
Removal
NOTES:
Some variation in the illustrations may occur, but the essential
information is always correct.
Some components shown removed for clarity.
Refer to: Electronic Parking Brake Service Mode Activation and
Deactivation (206-05 Parking Brake and Actuation, General
Procedures
