
Land Rover Discovery: Manual Transmission Transaxle External Controls Gearshift Cables (G1779360) / Removal and Installation
Land Rover Discovery (2009–2016) Service Manual / Powertrain / Manual Transmission Transaxle
and Clutch / Manual Transmission Transaxle
External Controls
Gearshift Cables (G1779360)
/ Removal and Installation
REMOVAL
NOTES:
- Removal steps in this procedure may contain installation details.
- Some variation in the illustrations may occur, but the essential information is always correct.
Refer to: Air Cleaner (303-12, Removal and Installation).
NOTE:
Neutral must be selected before the cables are released to allow the cables to be correctly set on the install.
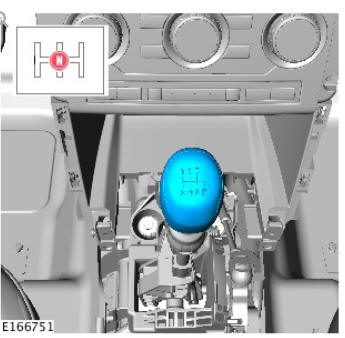
Install the gear selector knob.
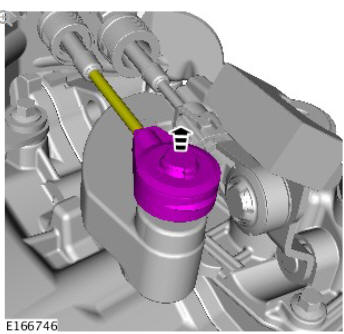
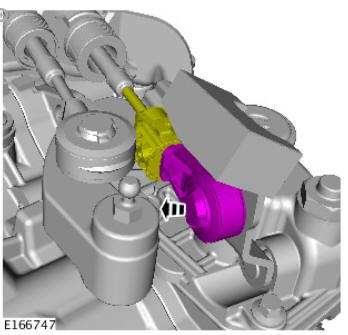
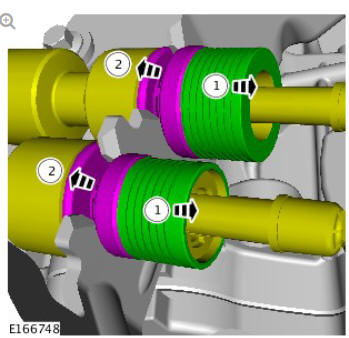
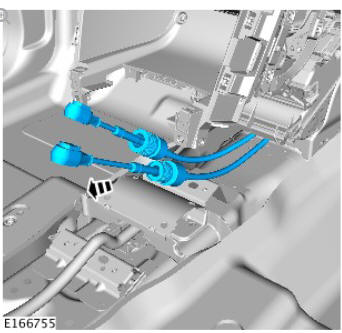
- Release the locking ring.
- Release the gearshift selector cables.
Refer to: Wheel and Tire (204-04 Wheels and Tires, Removal and Installation).
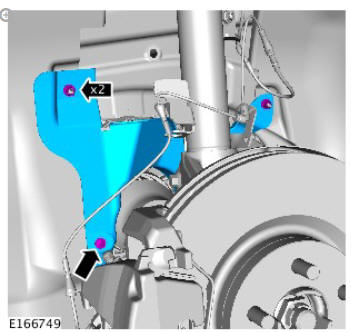
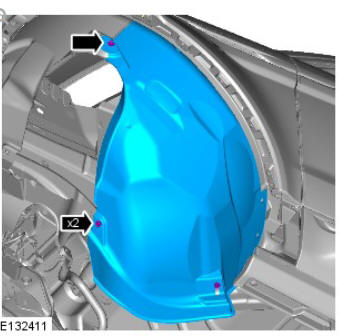
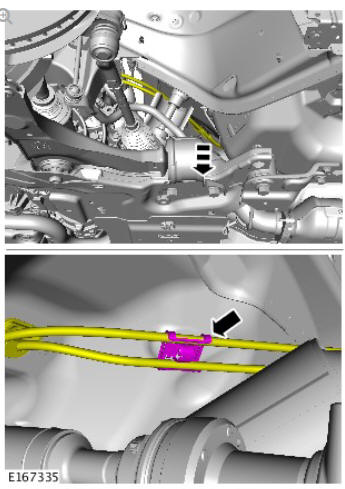
Refer to: Floor Console (501-12 Instrument Panel and Console, Removal and Installation).
NOTE:
Position the carpet to allow access to the component.
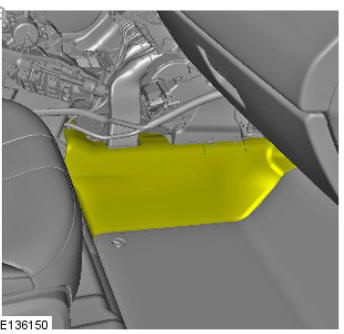
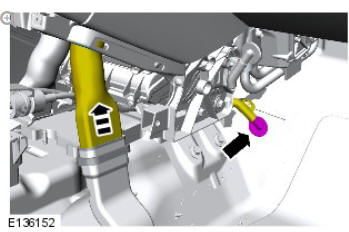
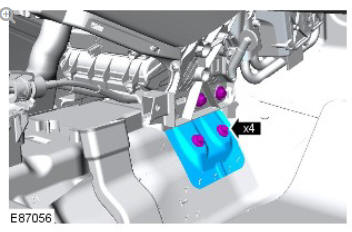
Torque: 25 Nm
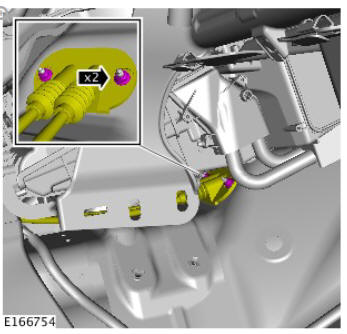
Torque: 7 Nm
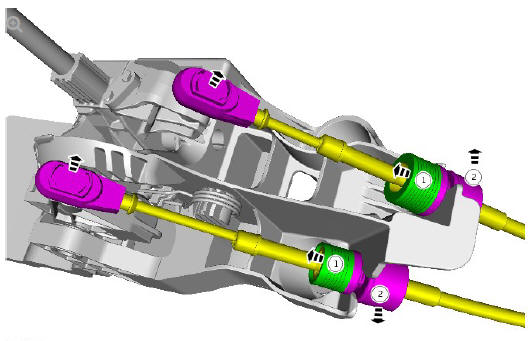
- Release the locking ring.
- Release the gearshift selector cables.
.jpg)
Torque: 10 Nm
NOTE:
This step requires the aid of another technician.
INSTALLATION
- To install, reverse the removal procedure.
- Check for correct cable adjustment.
Refer to: Gearshift Cable Adjustment (308-00 Manual Transmission/Transaxle and Clutch - General Information, General Procedures).
 Manual Transmission - Transaxle
/ Diagnosis and TestingManual Transmission - Transaxle
External Controls
Gearshift Lever (G1781378)
/ Removal and Installation
Manual Transmission - Transaxle
/ Diagnosis and TestingManual Transmission - Transaxle
External Controls
Gearshift Lever (G1781378)
/ Removal and Installation
READ NEXT:
 Manual Transmission - Transaxle
External Controls
Gearshift Lever (G1781378)
/ Removal and Installation
Manual Transmission - Transaxle
External Controls
Gearshift Lever (G1781378)
/ Removal and Installation
REMOVAL
NOTES:
Removal steps in this procedure may contain installation details.
Some variation in the illustrations may occur, but the essential
information is always correct.
NOTE:
Neutral must
Manual Transmission - Transaxle
External Controls
Gearshift Linkage (G1781377)
/ Removal and Installation
REMOVAL
NOTES:
Removal steps in this procedure may contain installation details.
Some variation in the illustrations may occur, but the essential
information is always correct.
CAUTION:
Make sure
Manual Transmission - Transaxle
External Controls
/ Description and Operation
COMPONENT LOCATION
Selector lever knob
Selector lever
Selector lever housing
Selector lever cables
OVERVIEW
The manual transmission external controls comprise a selector lever
assembly and two
SEE MORE:
Hazard Warning Lamps
The hazard warning lamps are controlled by a non-latching switch in the
centre of the instrument panel. The hazard warning lamps operate at all
times when selected and are not dependent on the ignition power mode.
When the hazard warning lamps are selected on, all of the turn signal
indicators oper
Warning Devices / Description and Operation
COMPONENT LOCATION
Image Processor Control Module (IPCM)
Right Side Door Mirror Warning Lamp
Right Side Blindspot Monitoring Control Module (BMCM)
Rear View Camera (RVC)
Left Side Blindspot Monitoring Control Module (BMCM)
Left Side Door Mirror Warning Lamp
OVERVIEW
BLINDSPOT MONITORING SY
© 2019-2026 Copyright www.lrdisc.com
