Land Rover Discovery: Body Closures Liftgate (G1785717) / Removal and Installation
REMOVAL
CAUTION:
Make sure to protect the paintwork.
NOTE:
Some variation in the illustrations may occur, but the essential information is always correct.
- Disconnect the battery ground cable.
Refer to: Specifications (414-01 Battery, Mounting and Cables, Specifications).
- Refer to: Tailgate Moulding (501-08 Exterior Trim and Ornamentation, Removal and Installation).
- Refer to: 'D' Pillar Trim Panel (501-05 Interior Trim and Ornamentation, Removal and Installation).
- Refer to: 'C' Pillar Upper Trim Panel (501-05 Interior Trim and Ornamentation, Removal and Installation).
- Refer to: Liftgate Window Glass (501-11 Glass, Frames and Mechanisms, Removal and Installation).
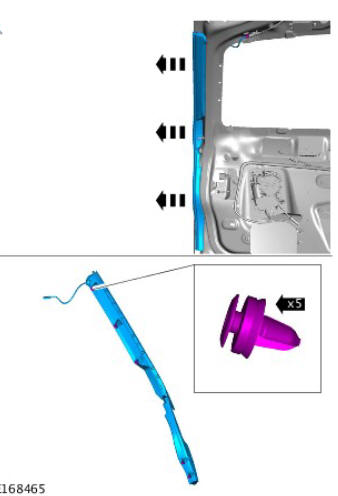
CAUTION:
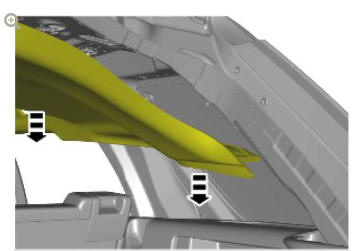
Do not use excessive force to release the headliner from the side retaining brackets.
NOTE:
Left side only.
.24.jpg)
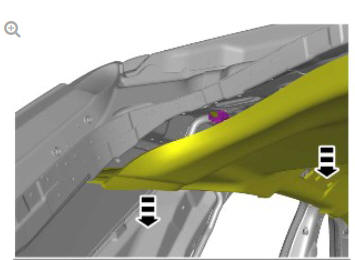
CAUTION:
Do not use excessive force to release the headliner from the side retaining brackets.
NOTE:
Right side only.
.25.jpg)
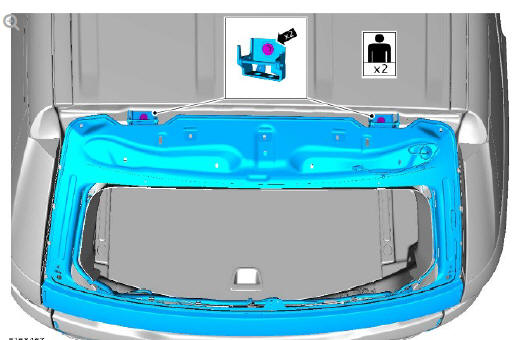
WARNING:
This step requires the aid of another technician.
NOTES:
- Note the orientation of the clip.
- The step must be carried out on both sides.
.26.jpg)
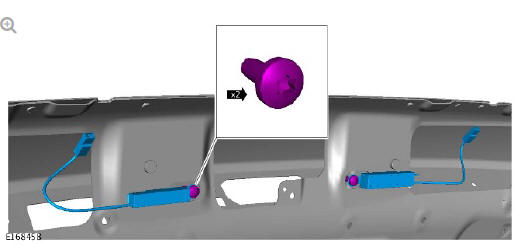
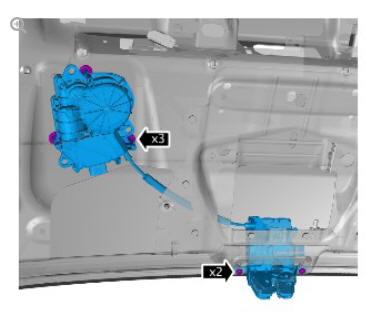
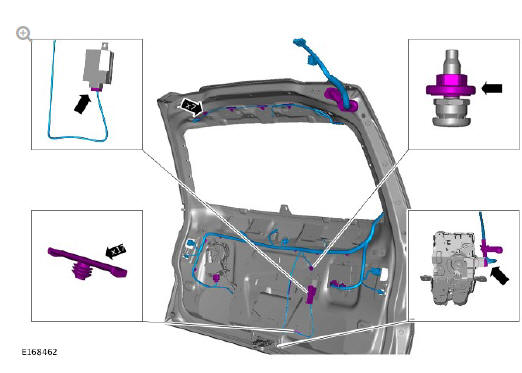
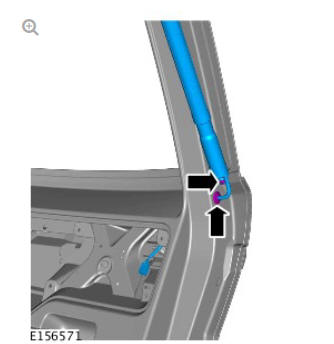
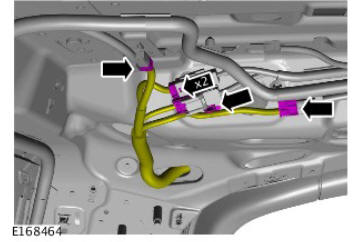
CAUTION:
Take extra care not to damage the wiring harnesses.
NOTES:
- Note the position of the component before removal.
- Do not disassemble further if the component is removed for access only.
.27.jpg)
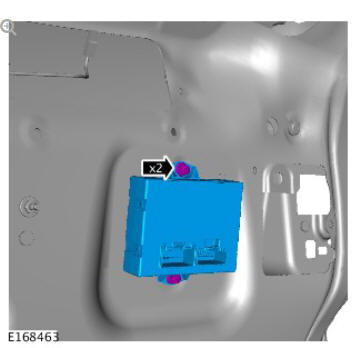
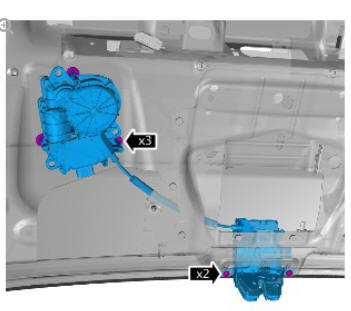
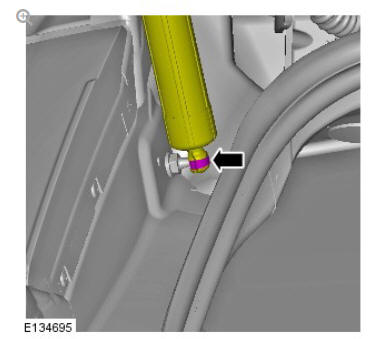
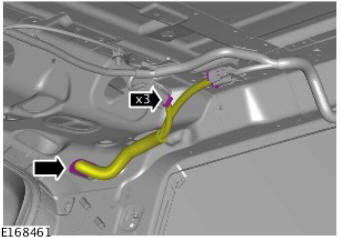
NOTE:
Note the position of the component before removal.
.28.jpg)
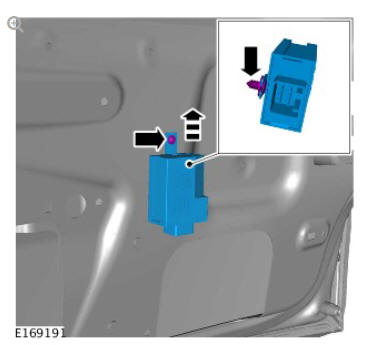
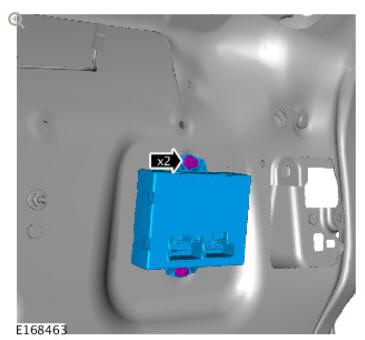
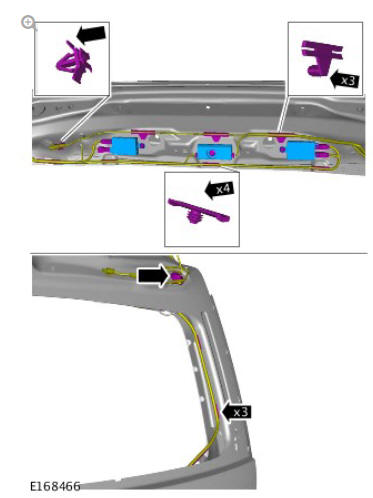
CAUTION:
Protect the surrounding components.
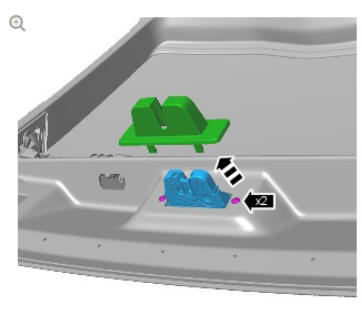
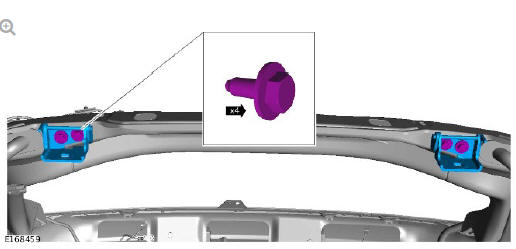
NOTES:
- Note the orientation of the clip.
- The step must be carried out on both sides.
.29.jpg)
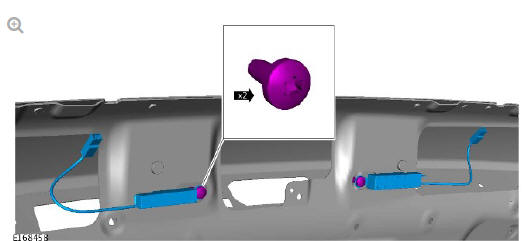
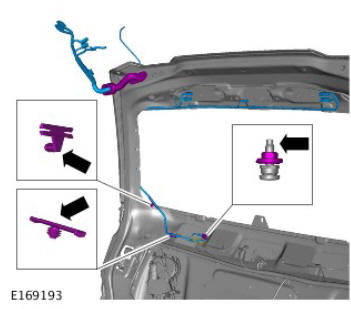
CAUTION:
Take extra care not to damage the wiring harnesses.
.30.jpg)
.31.jpg)
CAUTION:
Take extra care not to damage the wiring harnesses
.32.jpg)
NOTE:
Repeat the step for the other side.
.33.jpg)
INSTALLATION
Torque: 3.5 Nm

Torque: 2.5 Nm
Torque: 3.5 Nm

Torque: 3.5 Nm
Torque: 3.5 Nm
NOTES:
- Repeat the step for the other side.
- Install new retaining clips.
CAUTION:
Take extra care not to damage the wiring harnesses.
NOTE:
Install new retaining clips.
CAUTION:
Take extra care not to damage the wiring harnesses.
CAUTION:
Protect the surrounding components.
NOTES:
- Note the orientation of the clip.
- The step must be carried out on both sides.
NOTE:
Make sure that this component is installed to the noted removal position.
Torque: 25 Nm
CAUTIONS:
- Take extra care not to damage the wiring harnesses.
- Tighten the component finger tight first.
WARNING:
This step requires the aid of another technician.
NOTES:
- Note the orientation of the clip.
- The step must be carried out on both sides.
Open the liftgate.
NOTES:
- Make sure that the tailgate is recessed by 1.8mm in relation to the fender at point 1.
- Make sure that the tailgate is recessed by 3.2 mm in relation to the fender at point 2.
- Make sure that the tailgate is recessed by 3.2 mm in relation to the fender at point 3.
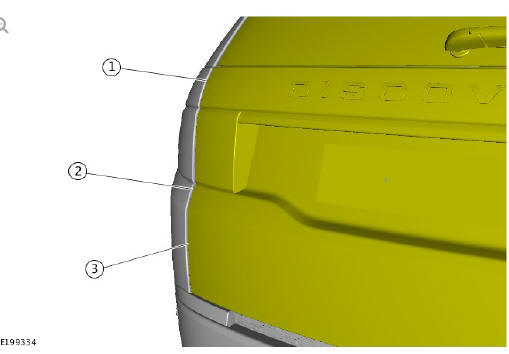
Position the liftgate central to the aperture.
Torque: 24 Nm
NOTE:
The following steps should be completed if installing a new tailgate.
Clean the area prior to installation of the new Tailgate Badges.
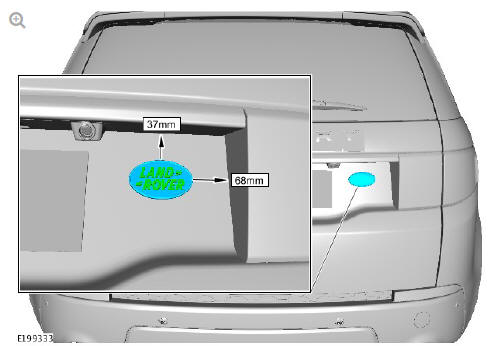
NOTE:
The new Tailgate Badge is supplied on a cassette which is highlighted in blue on the illustration.
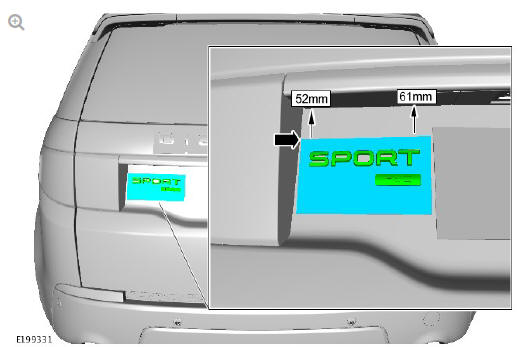
- Align the tailgate badge cassette so that the top left corner touches the inner tail lamp assembly in the highlighted position.
- Install the Tailgate Badges to the dimensions shown in the illustration.
NOTE:
The new Tailgate Badge is supplied on a cassette which is highlighted in blue on the illustration.
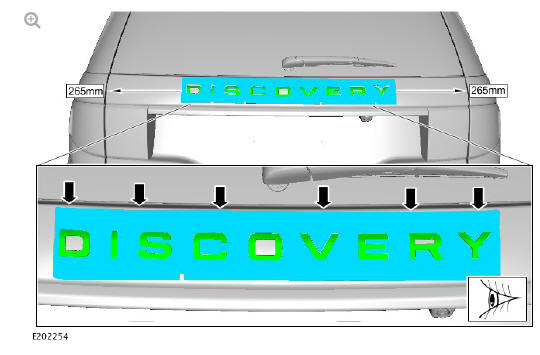
- Align the tailgate badge cassette to the curvature of the tailgate in the highlighted positions.
- Install the Tailgate Badges to the dimensions shown in the illustration.
NOTE:
The new Tailgate Badge is supplied on a cassette which is highlighted in blue on the illustration.
Install the Tailgate Badges to the dimensions shown in the illustration.
Refer to: Liftgate Window Glass (501-11 Glass, Frames and Mechanisms, Removal and Installation).
Refer to: Tailgate Moulding (501-08 Exterior Trim and Ornamentation, Removal and Installation).
Refer to: 'C' Pillar Upper Trim Panel (501-05 Interior Trim and Ornamentation, Removal and Installation).
Refer to: 'D' Pillar Trim Panel (501-05 Interior Trim and Ornamentation, Removal and Installation).
Connect the battery ground cable.
Refer to: Specifications (414-01 Battery, Mounting and Cables, Specifications).
READ NEXT:
 Body Closures Power
Liftgate Switch (G1889733)
/ Removal and Installation
Body Closures Power
Liftgate Switch (G1889733)
/ Removal and Installation
REMOVAL
NOTE:
Removal steps in this procedure may contain installation details.
CAUTION:
Make sure to protect the paintwork.
NOTE:
Make sure only a suitable plastic tool is used.
INSTALLATION
To i
Vehicle Specific Information and
Tolerance Checks
FRONT END BODY DIMENSIONS
NOTES:
All dimensions shown are in millimetres (mm).
Dimensions shown to holes, are always taken from/to the hole
centre. They are also always to the body panel surface,
SEE MORE:
Engine Cooling - Ingenium i4 2.0l Diesel / Diagnosis and Testing
PRINCIPLES OF OPERATION
For a detailed description of the Engine Cooling system, refer to the
relevant Description and Operation section in the workshop manual.
REFER to: Engine Cooling (303-03B Engine Cooling - INGENIUM I4 2.0L
Diesel, Description and Operation).
INSPECTION AND VERIFICATION
WARNIN
Rear Safety Belt
Buckle (G1814165) / Removal and
Installation
REMOVAL
WARNINGS:
To avoid accidental deployment and possible personal injury,
the
backup power supply must be depleted before repairing or
replacing any air bag supplemental restraint system (SRS)
components. To deplete the backup power supply energy,
disconnect the battery ground cable and
