Land Rover Discovery: Roof Sheet Metal Repairs Roof Panel (G1770876) - Removal
Land Rover Discovery (2009–2016) Service Manual / Body / Body Repairs and General
Information / Roof Sheet Metal
Repairs Roof
Panel (G1770876) / Roof Sheet Metal
Repairs Roof
Panel (G1770876)
- Removal
NOTE:
The roof panel is installed in conjunction with:
- Windshield
- Headliner
- Front seat
- Rear seat cushion
- Side air curtain module
- Roof moulding
- Liftgate
- Antenna
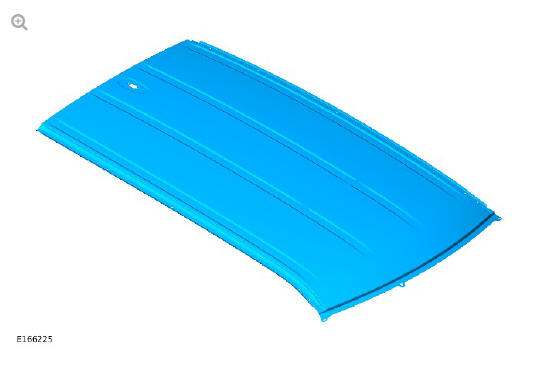
- The roof panel is serviced as indicated.
- Before commencing this procedure make sure that you are aware of
all Health and Safety requirements.
For additional information, refer to: Health and Safety Precautions (100-00 General Information, Description and Operation).
- For further information on the methods, tools and fixings used in this procedure refer to the body repairs - general information section.
NOTES:
- Where self piercing rivets (SPR) removal is instructed use either the approved SPR tool or 5.3mm drill bit.
- Any joints sealed as part of vehicle manufacture must be sealed as part of the repair.
- Make sure that the roof studs are replaced when installing the roof panel.
- For additional information, refer to: Windshield Glass (501-11 Glass, Frames and Mechanisms, Removal and Installation).
- For additional information, refer to: Headliner (501-05 Interior Trim and Ornamentation, Removal and Installation).
- For additional information, refer to: Front Row Seat - Vehicles With: Power Seats (501-10 Seating, Removal and Installation).
- For additional information, refer to: Rear Seat (501-10 Seating, Removal and Installation).
- For additional information, refer to: Side Air Curtain Module (501- 20B Supplemental Restraint System, Removal and Installation).
- For additional information, refer to: Roof Moulding (501-08 Exterior Trim and Ornamentation, Removal and Installation).
- For additional information, refer to: Liftgate (501-03 Body Closures, Removal and Installation).
- For additional information, refer to: Roof Pod (415-01 Information and Entertainment System, Removal and Installation).
- Release and position the wiring harness to one side.
- Make sure that all remaining interior trim items are adequately covered to protect from falling adhesive on installation.
- Protect the paintwork of the upper body sides with appropriate tape or material.
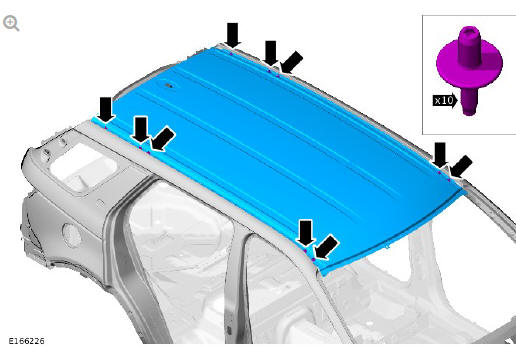
- Remove the roof studs as indicated.
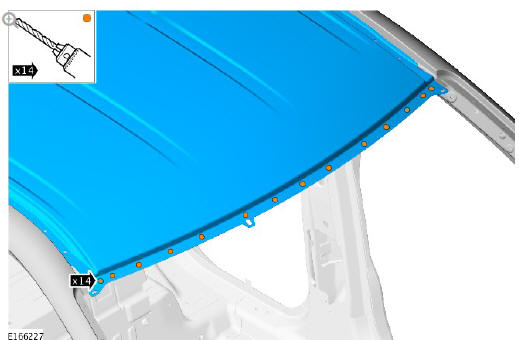
- Remove the SPR's as indicated.
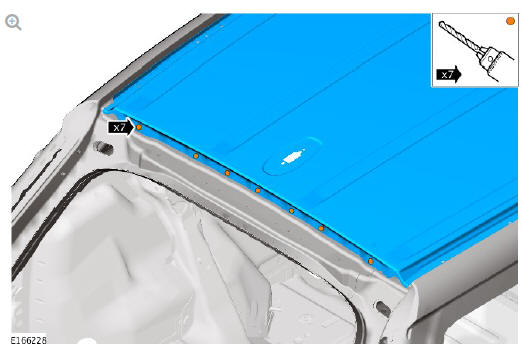
- Remove the SPR's as indicated.
CAUTION:
Care should be taken not to cut through into the inner reinforcements or roof bows.
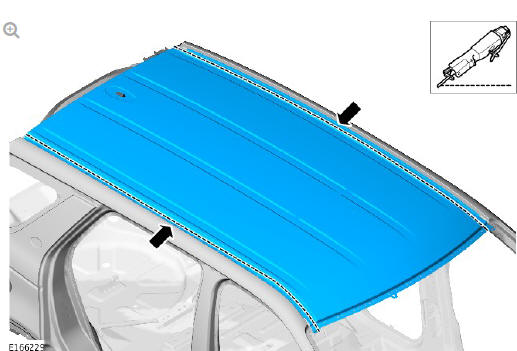
- Using a suitable cutting tool remove the bulk of the roof panel as indicated.
CAUTION:
This step requires the aid of another technician as the roof panel is heavy.
- Carefully separate the joints and remove the bulk of the old roof panel, also releasing the adhesive from the roof bows and reinforcements.
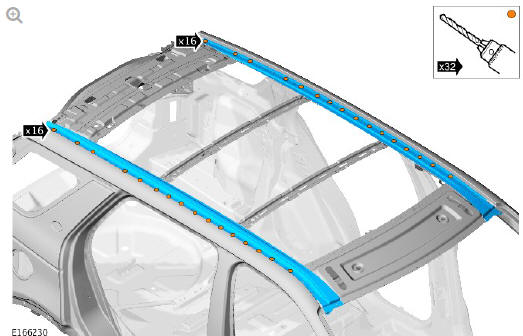
- Remove the SPR's as indicated.
- Carefully separate the joints and remove the remnants of the roof panel.
READ NEXT:
 Roof Sheet Metal
Repairs Roof
Panel (G1770876)
- Installation
Roof Sheet Metal
Repairs Roof
Panel (G1770876)
- Installation
Installation
NOTE:
SPR installation requires using the Land Rover approved SPR tool.
Dress the flanges where necessary.
Clean and prepare the panel surfaces.
Clean out the threads on the cap
Roof Sheet Metal
Repairs Roof
Front Panel (G1770881)
- Removal
NOTE:
The roof front panel is installed in conjunction with:
Windshield
Headliner
Front seat
Side air curtain module
Glass roof panel
The roof front panel is serviced as indicated.
Before
SEE MORE:
Operation - Incontrol Touch Plus Audio Systems
NOTE:
Only basic voice commands are available on Japan market
specification vehicles.
The voice control system provides the driver with the option
of voice control
for a range of supported functions. The following systems can be controlled
by voice control:
Bluetooth Telephone system
Navigation
Front Seat Height
Adjustment Motor (G1780406)/
Removal and Installation
REMOVAL
WARNINGS:
To avoid accidental deployment and possible personal injury,
the
backup power supply must be depleted before repairing or
replacing any air bag supplementary restraints system (SRS)
components. To deplete the backup power supply energy,
disconnect the battery ground cable a
© 2019-2026 Copyright www.lrdisc.com
